Adding a user profile
Providers are set up from the User access and permissions window. Access to this window is managed by the organization’s user administrator.
From the New User window, you can enter the information needed to create a new user account. You can give each new user a role, which allows the user to have certain permissions and perform certain actions in the system. You can also assign the user to one or more work locations.
-
From the User access and permissions window, select New user.
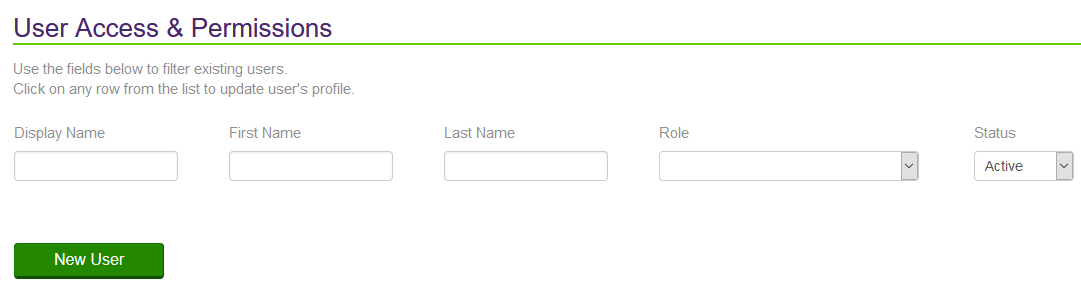
The New User window is displayed.

-
Enter the user's First Name, optional Middle Name, and Last Name.
-
Enter a Display Name.
This is the username, which is displayed in various areas of the Provider Portal.
-
Select the user's preferred Language.
-
Optionally enter the user's email address info@mydomain.com.
The user's login credentials are emailed to this address. The user’s email address must be different from the one indicated at the time of registration. If no email address is entered, then the login credentials are sent to the email associated with the billing number.
The email address you enter when setting up the account cannot be the same one that is used to identify the provider. By default, the email address you used to set up the account is displayed, but it must be overwritten. For further information, see Removing a user's email address
-
Optionally enter the user's Phone Number.
-
In the Roles section, select the roles that the user should have.
The roles determine the user’s permissions within the system. Your roles (as the logged-in administrator) determine which roles are displayed. As a user administrator, you can create a user administrator account for another person by selecting the User Administrator role.
-
In the Work Location(s) section, select the locations for which the user will submit claims.
Your work locations (as the logged-in administrator) determine which locations are displayed.
-
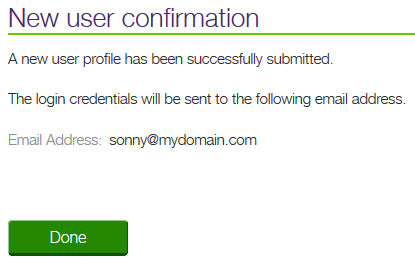
Select Submit.
The New User Confirmation window is displayed, indicating the email address to which the user’s login credentials will be sent.
-
Select Done.
The User access and permissions window is displayed.
Note: When the user profile is created, the system automatically generates a unique user name and associates the user to the organization’s TELUS Provider ID.
Note: If the user’s email address has been entered, an email is sent to the new user providing his or her user name and temporary password, along with a link to the portal.